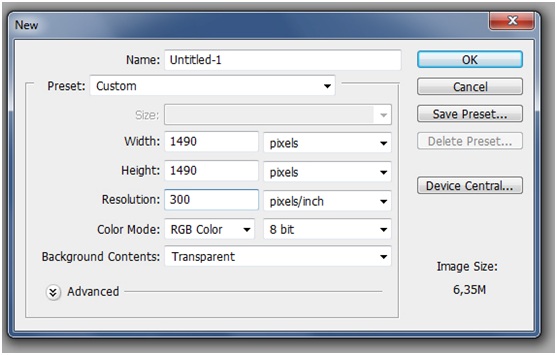
Start off by making a new canvas, 1490x1490 pixels. Set the values as in the photo below.
Step 2 - Extract Model
Start by opening your model stock in Photoshop and extract it from background.
Use the Pen Tool (P) to draw a path around the model's silhouette .
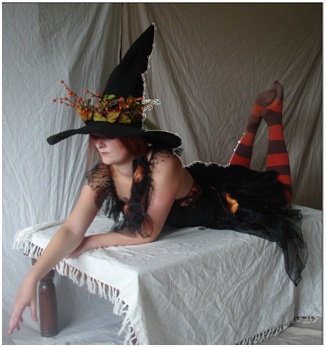
Important ! Keep the zoom to about 100% to see clearly all the details.
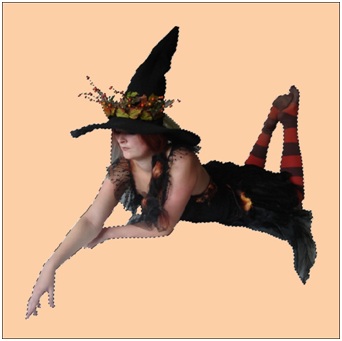
Click right on the path and choose Make Selection. Select Inverse Shift+Ctrl+I, and copy selected to new layer Ctrl+J, rename this layer to "Model".
Step 3 - Skin retouching
Press Ctrl+J to duplicate "Model" layer and rename to "Model retouch", go to Image>Adjustments>Auto Color, reduce the opacity to 35%.
Select both layers "Model" & "Model retouch", then Merge them Ctrl+E, rename it again to "Model".
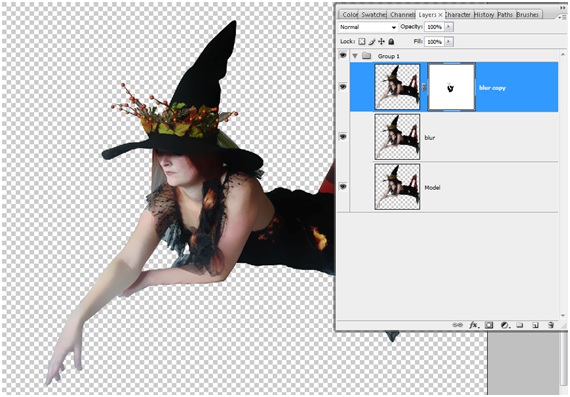
Duplicate the "Model" layer again, rename to "blur". Now you can add some blur on her skin. Open up the Filter menu Filter>Blur>Surface Blur
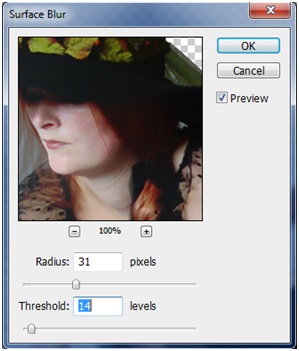
Add a layer mask to "blur". Invert (than you see nothing) and use a Brush (B) with black foreground and white background color to erase the parts which must remain sharp, for example: eyes, cheekbones, clothes etc...
After adding a blur, we set layers adjustments to get interesting lighting and warm colors on the model.
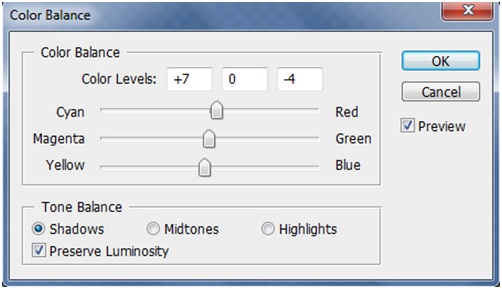
Choose 'Create new fil'l or 'Adjustments layer', select Color Balance
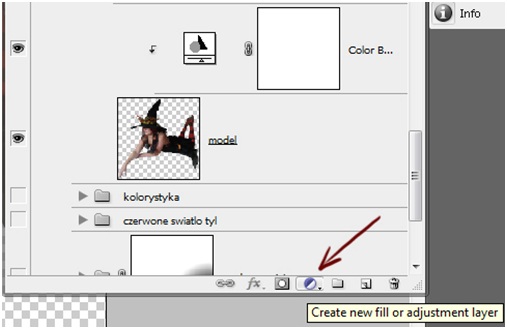
Create a Clipping Mask layer on top of this "model" layer.

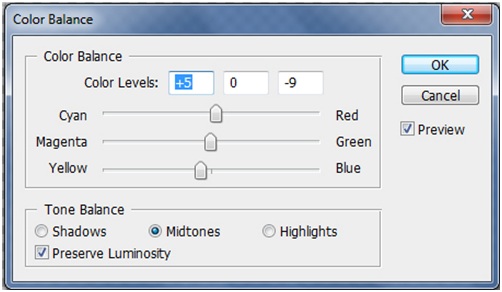
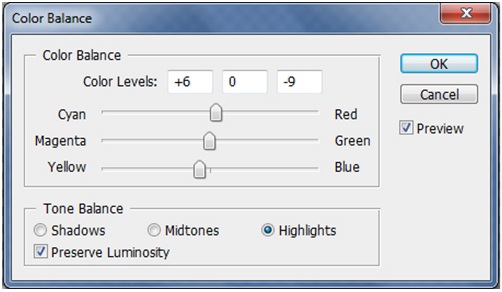
Settings for Color Balance
Now our model looks much better.
Step 4 - Model make-up
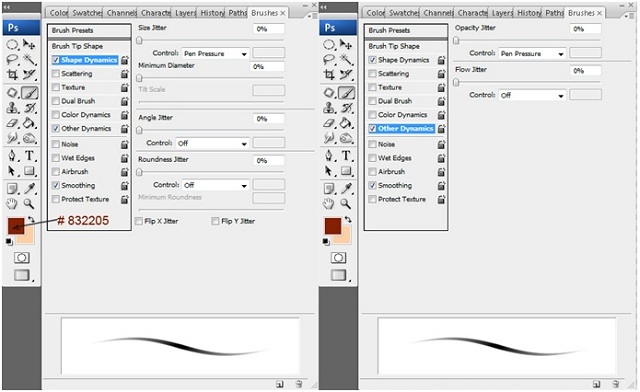
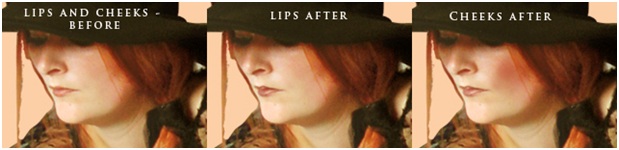
Painting Lips - Use hard brush (settings on the picture), set the opacity 50% and flow 50%. choose red color #832205 and paint lips. Then I add some light on the lower lip and lips are finished.
Painting cheeks - use the same color as above and paint cheeks, see result below:
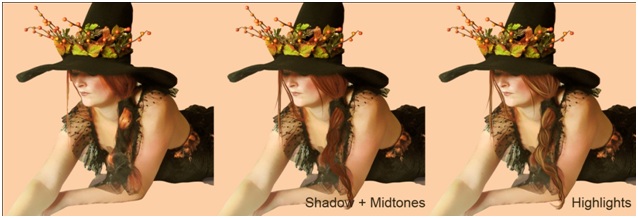
Step 5 - Model hair
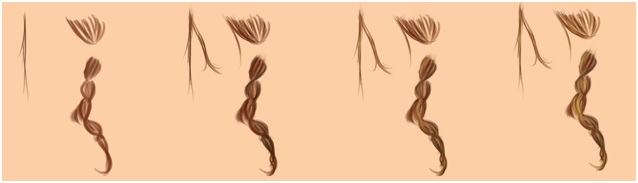
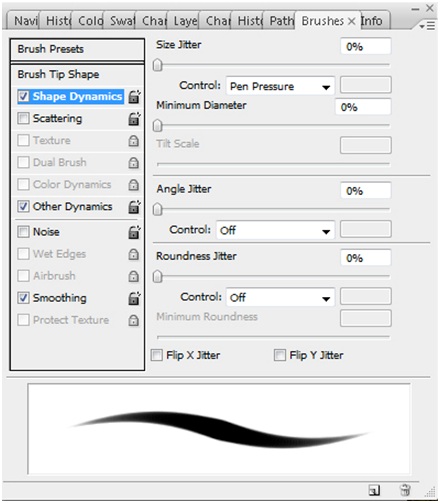
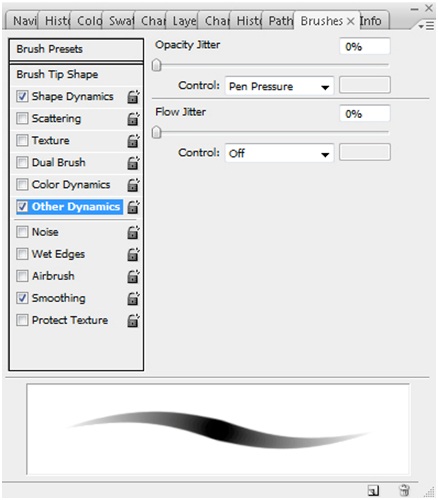
Grab Hard Brush B, apply Shape Dynamics and Other Dynamics and use the following colors: #510702 (shadow), #932f11 (midtones), #ffd76a (highlights).
We still use the brush settings as in step 4. Start with Opacity 100% and Flow 100% to get basic shape of the hair. Now you can change opacity and flow to get different shadow and light hair effects.
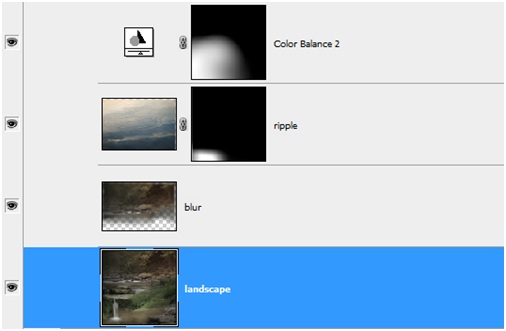
Step 6 - Creation of landscape
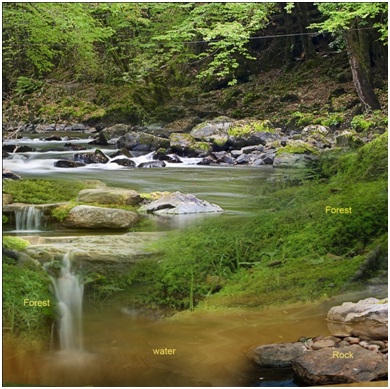
It's time to create beautiful backgrounds - use stocks below:
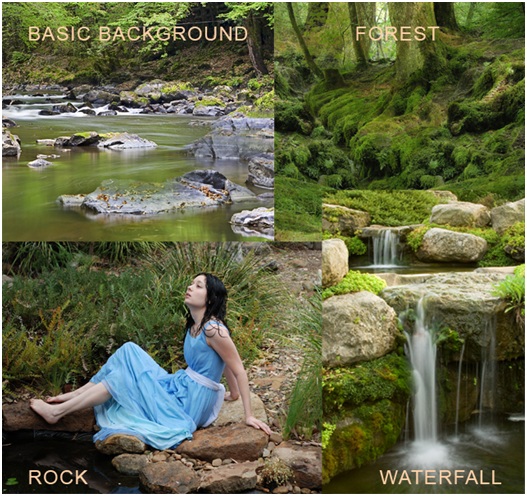
Open the "Basic background" image and drag the stock background image to your canvas and make a new group for it Ctrl+G, rename this group to "landscape".
Next open forest.jpg, drag the stock background image to your canvas and place it in the "landscape" group.
Again open the "Waterfall.jpg" and repeat step above.
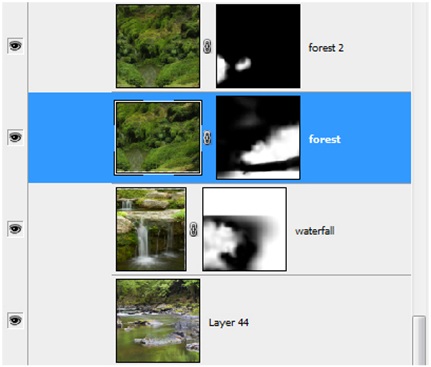
Add a layer mask to all the images that you put on "landscape" group. Select a Brush (B), set the black color, and start to erase the unnecessary parts. in this way we get a beautiful landscape.
Open the "Waterfall.jpg" grab the Pen Tool (P) to draw a path around the rock. repeat step 2 (we did the same thing with the model)
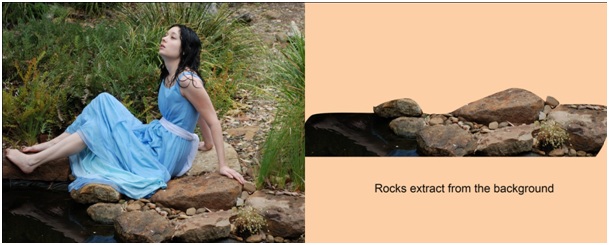
Open & move rocks to your canvas, place it in the landscape group. Use a layer mask and Brush (B) to fit the rocks in the background.
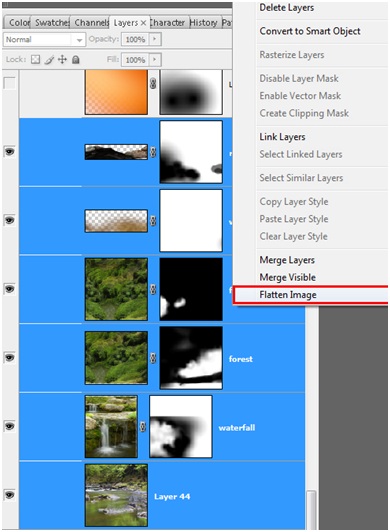
Now we need to flatten layers. select the layers to flatten, (hold key Ctrl), right-click select "Flaten Image".
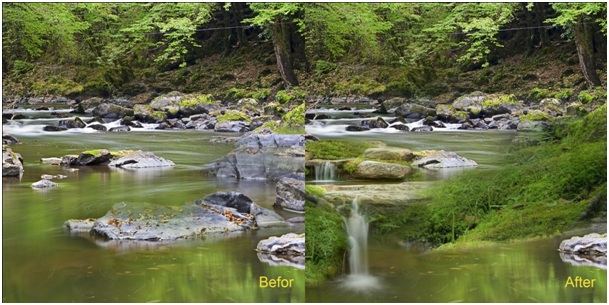
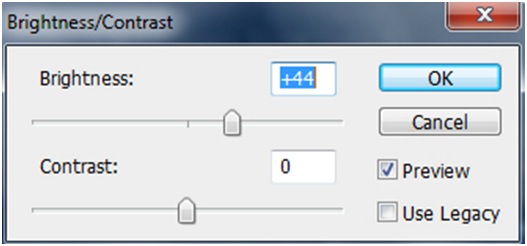
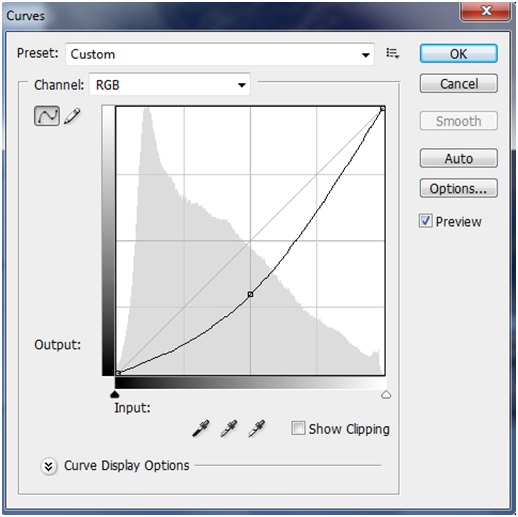
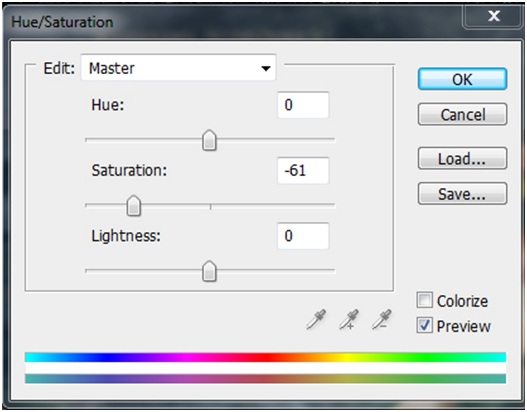
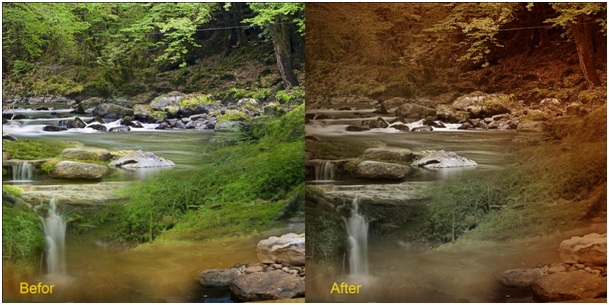
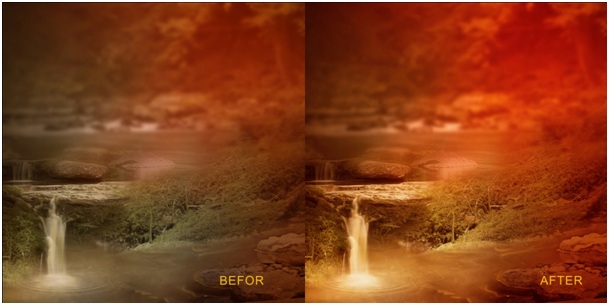
After you merge landscape group - make adjustments in order to get the interesting lighting and colors. I choose autumn colors because I like vibrance colors (you can choose others, for example dark colors like navy, black, etc.)
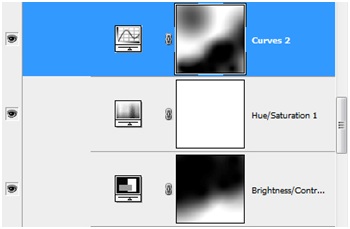
Create a new adjustments layers and go to Brightness/Contrast, Curves and Hue/Saturation
Apply the next settings:
Create New Layer: Layer/New Layer and with the Gradiant Tool (G), add black color from the left to the right on the background and blend in with the layer opacity.

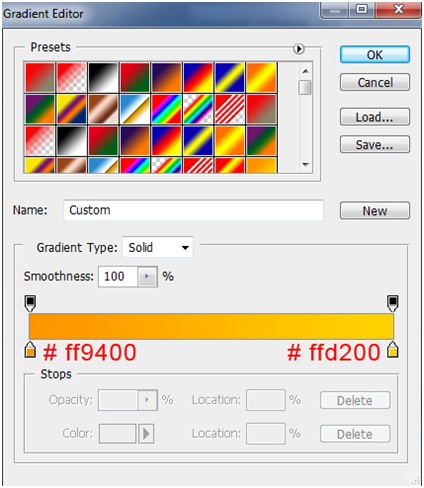
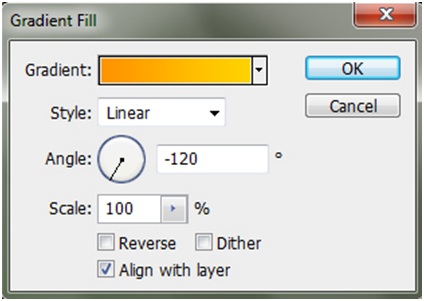
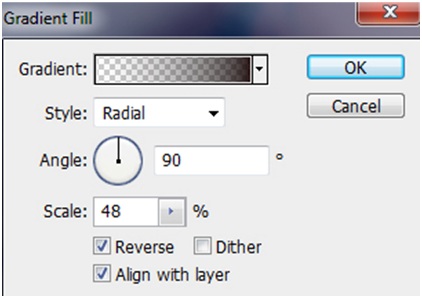
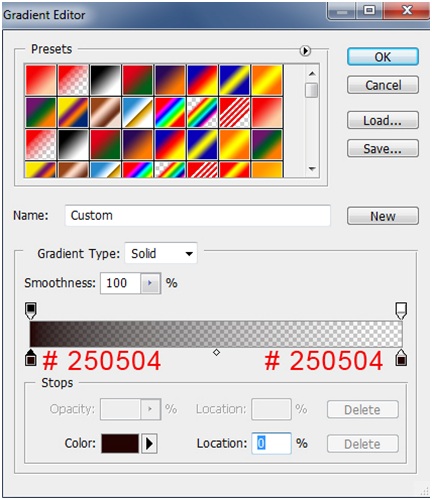
Now we create a warm touch of colors in the landscape. Go to Create a new Adjustment Layer, choose Gradient.

Select Gradient in the palettes and in the options select Rasterize Layer, set Blending Mode to Soft Light and apply the next settings:
You get something like this:
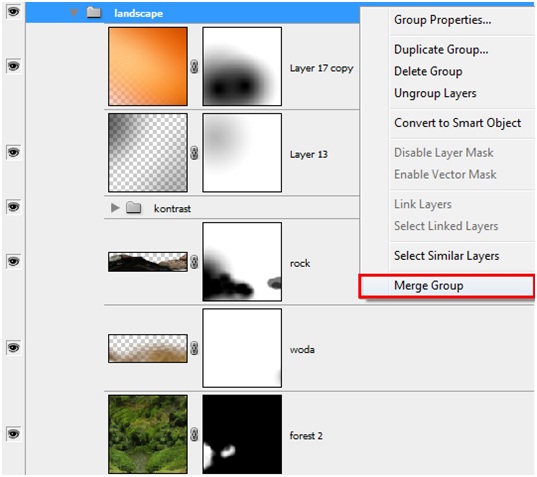
Now we need to merge "landscape" group. Select "landscape" group in the palettes to merge, Right-click and in the options select "Merge Group"
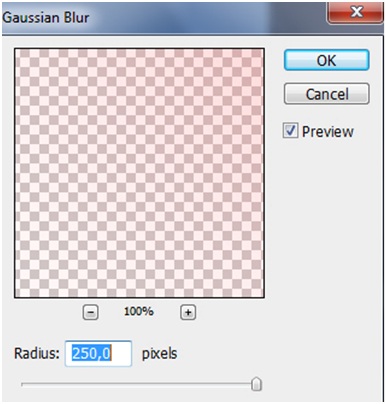
When we have all the layers together, choose the Lasso Tool (L), go to the Feather and set 25px.
Go to Filter>Blur>Gaussian Blur
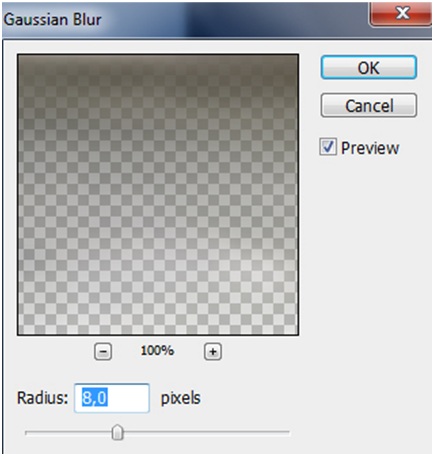
We achieve realistic blur.
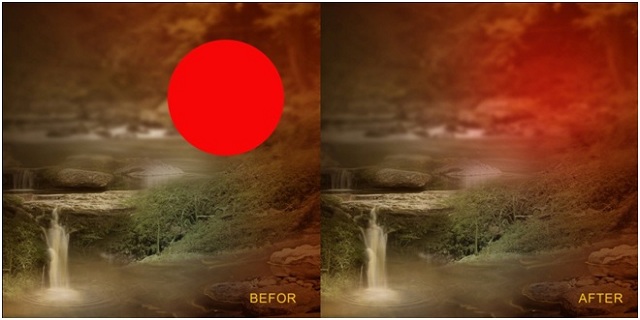
Step 7 - Landscape - Shadows/highlight
We need highlights and shadows to make realistic artwork so the next step is add light and shadow... here we go!
Set color #f50a0a (you get red lighting), use the soft Brush tool (B), paint one dot with a red color #f50a0a and apply Gaussian Blur as below:
Your artwork should look like this:
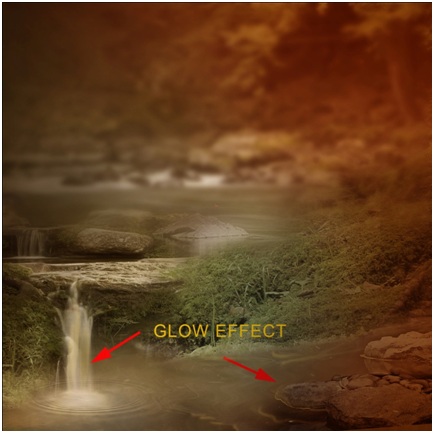
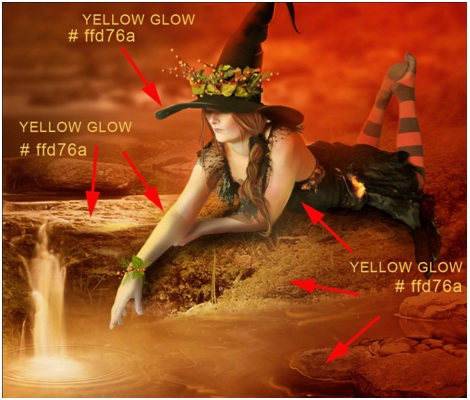
Additionally, we create light on the water.
Use a soft brush with yellow color #ffd76a, apply Gaussian Blur the same as in the step 7.
Now You can start to adjust the landscape. The best way to do is to go to New Layer adjustmen and choose Brightness/Contrast, Photo Filter, Color Balance to colour your Landscape.

Your artwork should be similar like this:
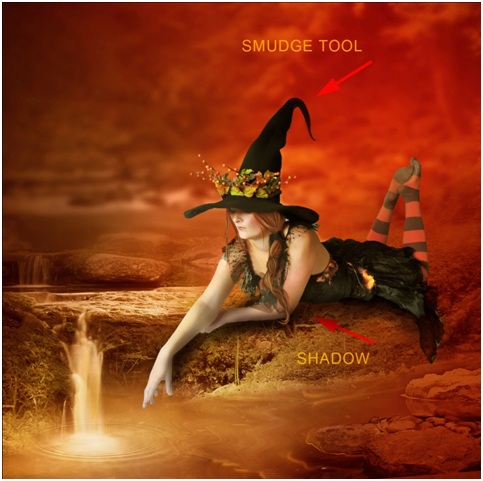
Step 8 - Shadow under the model
Set the black color, paint shadow under the model, set the Blending Mode to Multiply at 40-50%. In this way we created a realistic shadow!
You can also use the Smudge Tool (R) to create a hat with funny end shape.
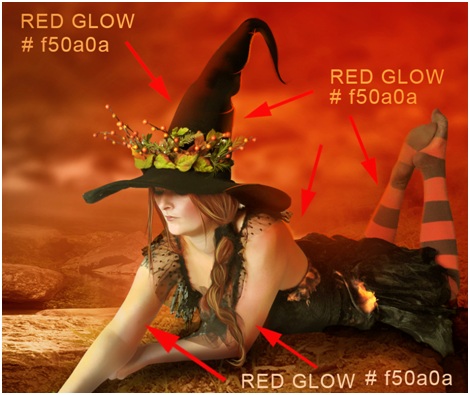
Step 9 - Model - lights and shadows
Using hard brush (settings below), we paint the shadows and light falling on the model. Add lights and shadows on hands, hat, legs etc. Use red color #f50a0a and make red glow.
Use same settings as above, choose the yellow color #ffd76a and start painting yellow glow.
Your artwork should look like this:

Step 10 - Details
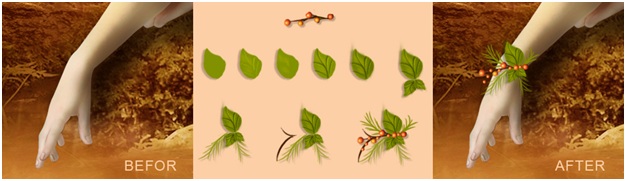
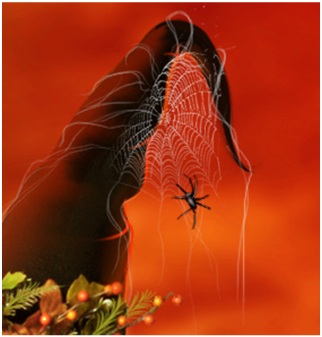
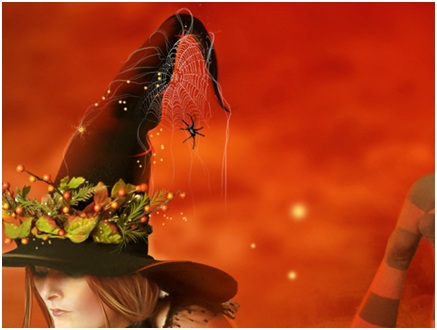
Now we add a few details, the spider on the hat, plants on the hand.

Use brushes with Spiders and Spiderweb, you can find them on DA:
http://frozenstocks.deviantart.com/art/Spider-Webs-1-132864200
http://henda-stock.deviantart.com/art/Spider-Brushes-34870510

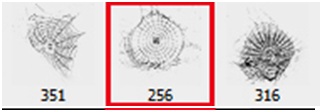
Use a soft brush, set white color foreground and start painting spiderweb around the hat.
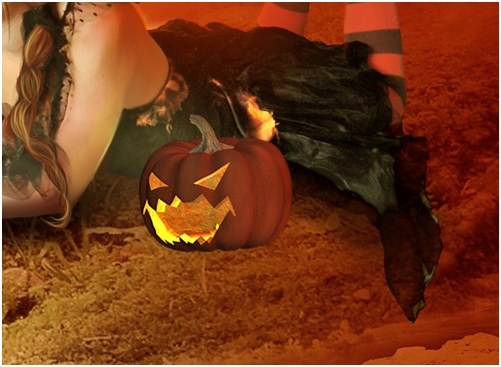
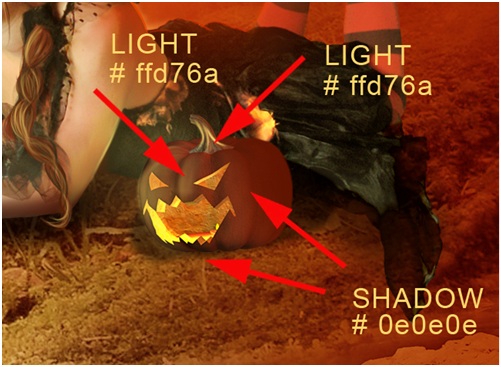
Step 11 - Add pumpkin
Open the "pumpkin.jpg" file, drag the stock pumpkin image to your canvas. set next to the model and paint light and shadow (use soft brush and rest of the settings as in step 9). So now it looks good.
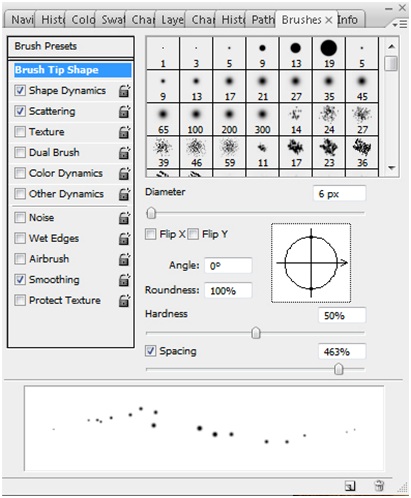
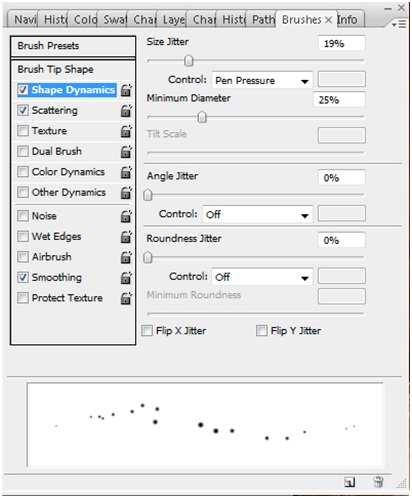
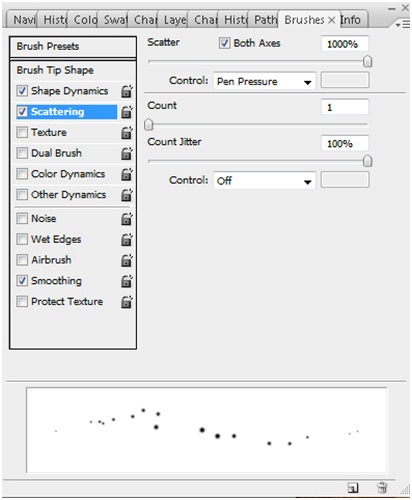
Step 12 - Glowing dust
You can create a magical glowing dust around a hat and a hand model. Apply Shape Dynamics and Scattering. Grab Brush (B) and use the following settings:
Step 13 - Final result
Time for the Final adjustments !
Select all layers (hold the Shift key), right click on the palette and choose Flatten Image.
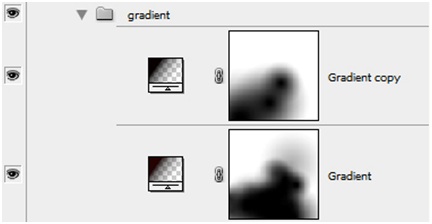
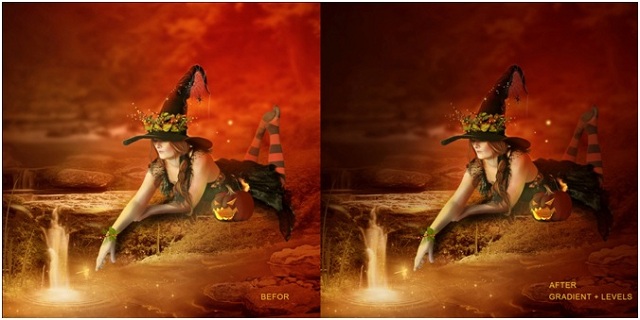
If You have all Your parts together then you can start to adjust the artwork. The best way to do so is to choose New Adjustment Layer>Gradient and New Adjustment Layer> Levels to give "depth" to your artwork.
Gradient:
Change Gradient layer opacity at 61%, Fill at 76%. Duplicate the Gradient Layer and change the Opacity at 34%, Fill: 48%.
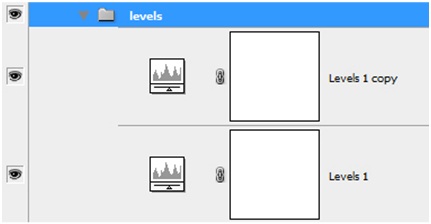
Levels:
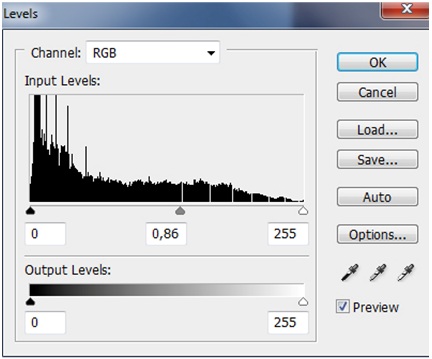
Change Levels layer opacity at 77%, Fill at 66%
Duplicate the Levels Layer - settings are the same as above.
Your artwork should look like this:
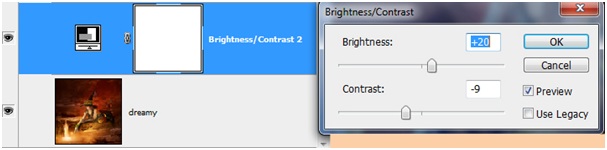
In next Step Go to Image>adjustments>Brightness and Contrast
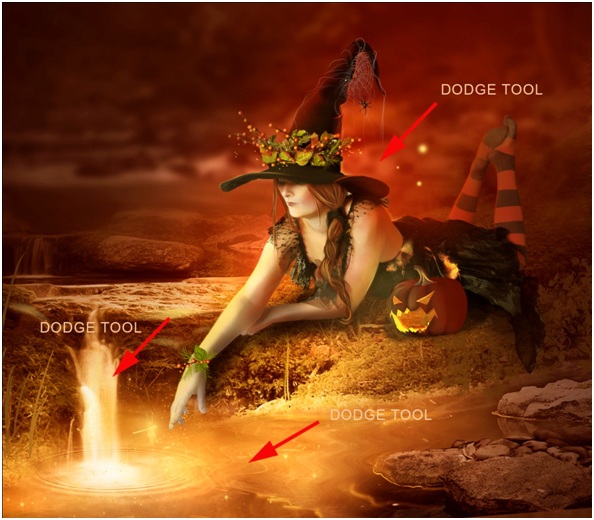
Merge Layers and Grab the Dodge Tool (O) with the range set to highlights and an exposure of about 10% - 12% with a soft round brush, stroke around the lighter parts of the artwork:

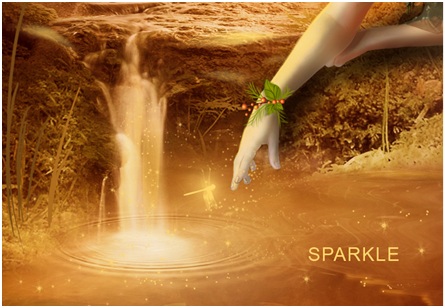
Your Final artwork should look like this:
That's it, here is the witch, blowing sparkles indeed.
Hope you enjoyed the tutorial ! Good luck !
Tidak ada komentar:
Posting Komentar